Dueling Dhows

Dueling Dhows
for Mark, Sarah, and Michael

Monday, July 16, 2018

Installing the False Bulkheads & Naming


July 16, 2018


With just a few items left to complete the Dhows, I wasted no time in getting some help to flip them right side up.  The to-do list was just a few items long, and was really excited to wrap them up and begin to focus on preparing them for transport.


I could not resist getting to the naming of the Dhows.  Its been far too long that I have been referring to them as the "blue Dhow" and the white Dhow"!!  The names are in reference to Mark & Sarah's fathers, and their child's (Michael) grandfathers - Sarah's dad George, and Mark's dad Jerry.  The colors chosen were there respective favorite.  We are excited to deliver them, and to see their expressions.  I ordered graphics, and installed per the instructions.  A simple procedure.


After the naming, I Installed the original "false bulkhead" on Jerry.  The panels are not structural; rather, they hold the flotation foam securely under the aft seating.  The panel is secured to cleats with seven 1" #8 silicone bronze wood screws.


With Jerry's panel in place, I turned to George to install its newly fabricated panel.  The condition of George, aka the blue Dhow, when I received it was much worse for the wear...and missing this aft panel, or false bulkhead.  I describe in an earlier post the process I undertook to create this new panel.  For the installation, I set the blank panel in place, and marked for the seven fasteners: 2 on the cleat to port, 2 on the cleat to starboard, and 3 down the center seat support.  I removed the panel and pre-drilled for the fasteners, including a countersink to recess the screw heads.  I again placed the panel into position, and used an awl to mark the cleats for the screw placement.  I again removed the panel and pre-drilled the cleats. With the prep work complete, I installed the panel with the seven fasteners.  In both installations I made sure place the flotation foam into position prior to securing the false bulkheads!


With a simple bowline, I secured a length of line to the bow ring to act as a painter.  The dueling Dhows are complete!  Next stop, Michigan!


Total Time Today: 2 hrs

Sunday, July 15, 2018

Gunwale Repair & Bottom Paint


July 15, 2018


I began this morning with completion of the gunwale repair I began yesterday.  I used a forstner bit to drill out the gouge in the gunwale in order to fill it with a bung of like material -white oak.  I set the bung yesterday with a touch of epoxy, and not it was time to remove the excess bung material.  I used a flat saw to remove the portion standing proud.


With a bit of hand-sanding with fine grit paper, I faired the gunwale.  I cleaned up the sanding residue and then treated the repair with boiled linseed oil as I had done on the whole of the gunwales.


Turning to the bottom paint, I began by removing a portion of the tape protecting the skeg and hull from yesterday's epoxy work.  Carefully, I sanded the edge of the tape line, and then came back in and sanded the field of the bottom.


I used 80-grit paper for the field and 150-grit for the tape line.  I vacuumed the surfaces of the Dhows and then wiped them down with a solvent.  I completed the prep work by adding a few sections of tape here and there.


Using Pettit SR-40 Dual Biocide (red), I applied two coats on each of the Dhows.  I removed the tape roughly a half-hour after I had completed the second coats.


I then came back and removed the tape around the skegs - white Dhow below...


...and the blue Dhow.


I thought I would be able to flip the Dhows back onto their hulls, but alas the bottom paint was yet too soft.  I scraped the plan of completing the Dhows today, knowing that I could easily wrap things up by mid-week.  I finished the day by doing some chores around the house, as well as preparing the trailer by replacing the safety chains, and then building a platform for one of the Dhows to ride on top of.  Nearly there!

Total Time Today: 2 hrs


Saturday, July 14, 2018

Installation of the Fwd Seat (white Dhow), Daggerboard Trunk Braces & Skegs


July 14, 2018

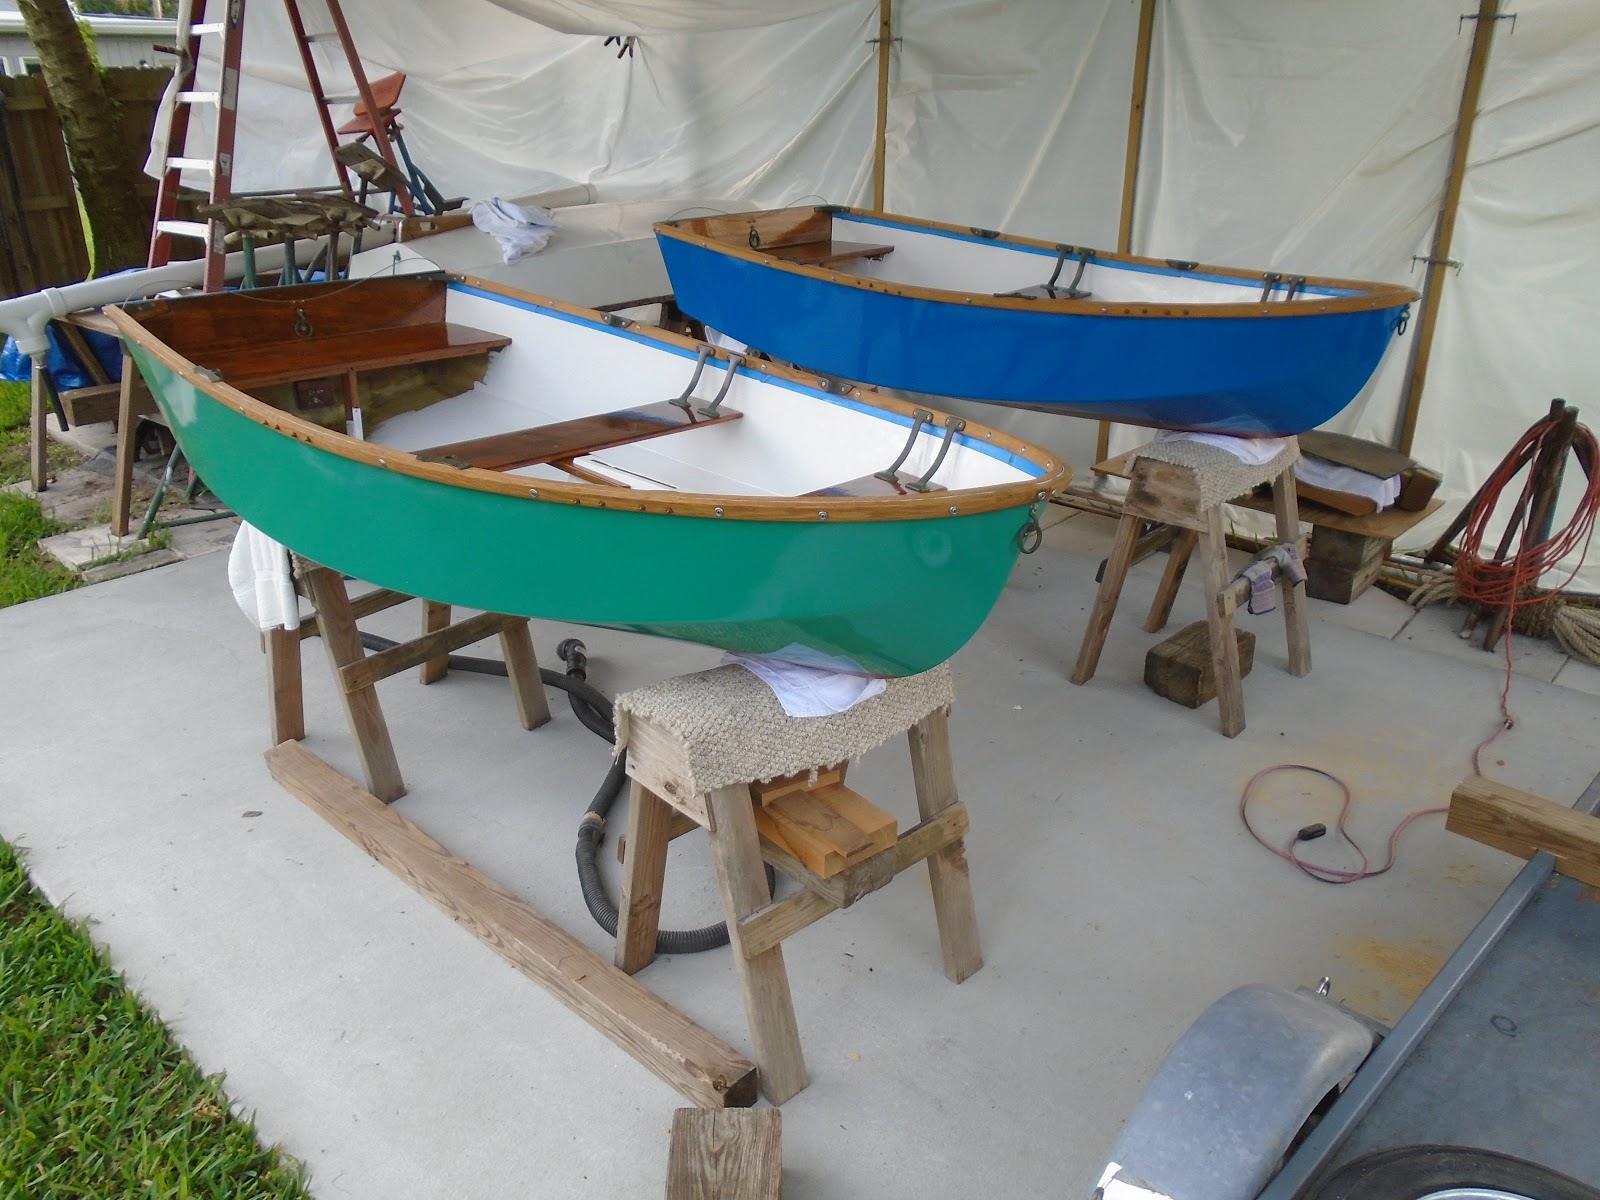
Closing in on completion, and no drama mind you (the departure date for delivery being less than a week out), I grabbed the forward seat for the white Dhow and re-installed it.  It donned on me, midway through setting the eight fasteners, that I probably should test-fit the mast to ensure the key in the mast step and the hole through the forward seat were aligned and would thereby allow the lower portion of the mast to "seat"into the step.  Alas, she fit snugly in her aperture.  With that confirmation I completed securing the fasteners.


I also cleaned up the polysulfide squeeze out on the white Dhow's rudder stock brackets, and then removed the tape to reveal the finished transom.


One last item was nagging at me prior to getting on with the day's "meat & potatoes", and that was repairing a mistake I made in the starboard outboard gunwale.  When installing the gunwale, I got a bit aggressive for a micro-second too long and ended up punching the drill bit through the assembly.  Not to worry.  I had a few white oak bungs on hand, and one of them would do just fine.  I inserted a 3/8" forstner bit into my drill and opened up a home for the white oak bung.  With just a brushing of neat epoxy, I gently tapped the bung into position.  I will take care of the portion standing proud tomorrow, and then reapply some boiled linseed oil to the surface. 


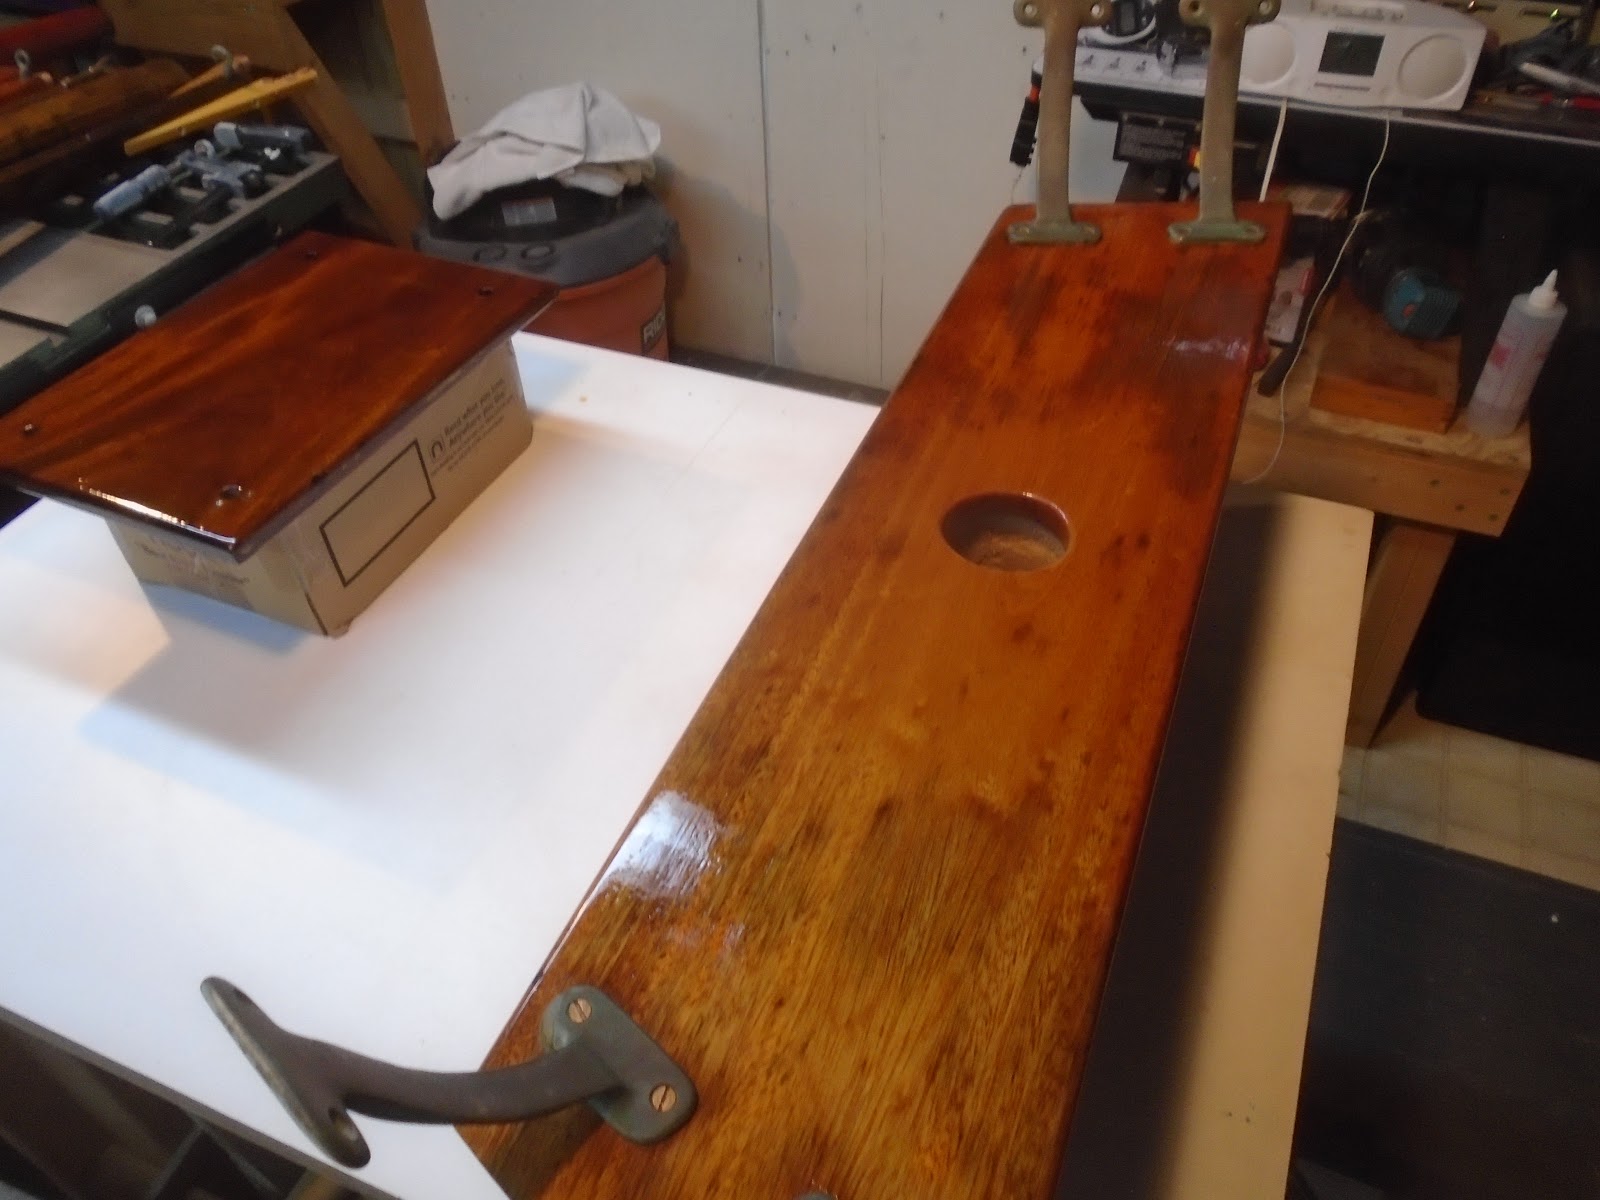
Okay, now on to what I really wanted to get done today!  I grabbed the daggerboard (DB) trunk braces and required installation materials and tools.  I set my sight on the white Dhow first, and mounted the DB trunk brace, clamping the aft portion to the middle seat.  Through a series of increasingly larger diameter drill bits, I gradually increased the diameter of the hole through the middle seat and the DB trunk brace.  The fastener I chose for the white Dhow's Db trunk brace was a #10/24 silicone bronze machine screw, backed with  washer and nut.  


I completed the installation of both fasteners to secure the aft portion of the DB trunk brace to the middle seat.  I then turned my attention to the forward portion of the DB trunk brace, where it mounted to the DB trunk itself.  I chose #10 silicone bronze wood screws, with tapered heads, for this installation - two per side.  I set the fasteners 4" on center from one another, pre-drilled and countersunk for the heads.  These 4 screws forward and the 2 machine screws aft completed the installation of the white Dhow DB trunk brace.


I repeated the exercise for the blue Dhow.  The only difference between the installations was that I chose 1/4" silicone bronze machine screws for where the aft portion of the DB trunk brace is fastened to the middle seat.


With the DB trunk braces installed, I conscripted some help in turning the Dhows over so that I could gain access to the hull for installation of the skegs.  


My first order of business was to sand the primer around the area that the skegs would be installed.


The sanding necessary in order to create a surface that would promote a good mechanical bond with the planned epoxy-based installation.  I thought about 'removability' of the skegs, but in the end I just wanted the skegs / lift handles securely mounted.  Heck, if I need to in the future, I will fabricate new ones to re-install.  - don't judge :)


I settled on the positioning of the skegs between the two Dhows, and then temporarily secured the skegs so that I could apply a layer of protect tape around their footprints.


Here is the white Dhow's skeg in position, with protective tape applied around its footprint.  The tape provides a couple useful aspects - 1. it denotes exactly where the skeg is to be installed, and 2. it protects the surrounding surface from epoxy squeeze out.


With the "where" resolved, I then set out to determine the location of the fasteners to help aid in the securing and installation of the skeg.  I took note of the aft seat brace (tabbed to the interior of the hull and located directly beneath the aft seat), and settled on a fairly equidistant location for the four fasteners.  Measuring from the aft-most portion of the skeg: 3/4", 9.75", 15.75", and 21.75".


I made marks on the hull of both Dhows and drilled for the fasteners.  I also transferred those marks to the underside of the skegs themselves.  I did this by again mounting the skegs in their final position, and crawling underneath the boats, I made pencil marks on the underside the skegs.  With those marks transferred, it was time to pre-drill for fasteners on the skegs.  The bottom the skeg, where it mates with the hull, follows the curve of the Dhow's bottom.  The angle of the screw is more or less perpendicular to the bottom of the skeg, and so as I pre-drilled for fasteners, I would need to ensure that I kept the drill at a 90' angle to the bottom of the skegs.  In the end, I was successful at this task. 


With the fastener holes prepped for installation, I went ahead and taped off the lower portion of the skews (to protect the varnished surface from epoxy squeeze out), and then headed over to the work shop.  I mixed ~1/2 ounce of next epoxy and painted this onto the bottom of the skegs as well as the bottom of the hulls.  I then mixed another small pot of epoxy, but this time thickened it with 406 colloidal silica and 407 low-density filler.  I applied this thickened epoxy to the surface the hulls, where the skegs would be mounted.


I firmly pressed the skegs into position, making sure that I had squeeze out all the way around the vertical surfaces of the skegs.  I then went below and mounted the screws through the interior of the hull and into the skegs themselves.  I was worried (not having help on hand) that the screws would push the skeg up as I attempted to drive the fastener home, but the pre-drill work paid off here.  The fasteners found their pre-drilled homes without incident.  As I tightened the fasteners, which by the way have a rubber washer seated just beneath the head of the screw and visible from inside the hull, the skegs were pulled firmly into position on the hull. 


The skegs mounted.  I will pull the protective tape tomorrow, and paint the bottoms with anti-foul.


The last item for the day was an anticipatory one.  I wiped down the hulls, and then applied tape in preparation for painting the bottom with anti-foul.  I should be able to wrap up the work tomorrow...unless of course I just want a bit of drama!


Total Time Today: 4.5 hrs

Friday, July 13, 2018

Mast Support Forward Seat (white Dhow)


July 13, 2018

Feeling lucky today, I decided to complete the mast support on the forward seat in the white Dhow...completing the 2 and 3/8" hole through the seat.  As the dimension suggests, I measured the circumference of the mast and decided that 2 and 3/8" would provide ample clearance AND support for the mast.  I applied a "sheet" of tape to the work area, laid out the cut lines, and then dropped the trim router into the field area to be cut.

I made several passes, dropping and raising the bit as needed, until I dialed in the correct dimensions and was generally satisfied with the material removal.


I sanded the area by hand to fine tune the surfaces - including a pass with the trim router outfitted with a 1/8" round over bit.


I extended the varnish area a bit to offer a seamless appearance, doing so with 220-grit by hand.


White I was at it, I sanded a seat to a tree swing I had made some time ago - a mahogany piece that had been sitting in the vegetable garden for far too long.  I thought I would take this up to Michigan for my little nephew.  I applied a coat of slightly thinned varnish to the tree swing as well as the seat, and then increased the thinner ratio to "paint out" the freshly cut surfaces.  I will come back tomorrow (and the next few days) to build up the coast of varnish on the mast support hole. 


Total Time Today: 2 hrs

Thursday, July 12, 2018

Odd & Ends (white Dhow)


July 12, 2018


This evening's session was one of finishing odds and ends...getting closer to the finished product.  I began by applying a layer of protective tape to the transom, down the centerline, and then laying out that centerline in order to establish a reference line to locate the rudder post hardware.


I placed the hardware and then traced around the bottom and top brackets, and also marked the fastener holes.  I drilled the fastener holes (#10/24 silicone bronze machine screws), and countersunk the surface to accept a sealing amount of polysulfide.


With the polysulfide applied, I began to mount the rudder post and brackets.  Beginning with the top bracket, I secured the lower machine screw and proceeded to secure the other two machine screws.


With the top bracket secured, I inserted the rudder post into the top bracket and then mounted the lower bracket, again using #10/24 silicone bronze machine screws with washers and nuts backing them.


With the rudder post hardware mounted, I turned my attention to trimming the outboard gunwales.  I sanded them to remove the harsh edges, and then proceeded to oil the gunwales.  I mounted protective tape inside and outside, and then applied a liberal application of boiled linseed oil to the gunwales.  With an application on the white Dhow, I then moved over for another application to the blue Dhow.  After completing a second application on the blue Dhow, I then moved back over for another application on the white Dhow.  Applying a layer of protective oil to the wood will be a seasonal maintenance item for Mark and Sarah...and in a few years, a summer job for Michael!

I completed the hardware installation on the white Dhow with the bronze stern knees and the mainsheet traveler - a stainless wire secured between the stern knees.


Back in the shop, I mounted the mainsheet block on the boom of the white Dhow - the fasteners that I had ordered especially for this task arrived today.


I vacuumed out the interior of the hull (having sanded the interior, including the db trunk), and wiped it down with a rag dampened with solvent.  With that complete, I poured a bit of finish paint into a cup and proceeded to apply the final coat of paint onto the white Dhow's db trunk and hull.


The paint is complete on both Dhows, and so tomorrow I will begin to secure the daggerboard trunk braces, both for the white and blue Dhows.


The forward seat on the white still requires a large holes drilled through it...another job that awaits my Friday evening.


The final task for the day was to mount the bow's lifting ring / painter ring on the white Dhow - silicone bronze machine screws secured with nuts on the interior.


Total Time Today: 3.25 hrs

Wednesday, July 11, 2018

Paint, Varnish, and Completing the Mast Step


July 11, 2018


After taking care of a couple to-dos, I managed to finally get to the Dhows.  This evening's tasks were some odds and ends, but we are at that point in the project where there just seems to be a lot of random, small projects.  

I began with hand-sanding the finish epoxy work I did yesterday evening on the white Dhow's db trunk.  I blended the fore and aft fillets, as well as the tabbing work port and starboard.  With this task complete, the db trunk was now ready for paint.  


Prior to painting out the db trunk I needed to get to routing out the slot in the white Dhow's mast step to accept the keyed portion of the mast.  The keyed portion of the mast was roughly 2" x 1", and I transferred those measurements to the mast step itself - using the drill marks that I made from a previous work session where in which I drilled through the mounted forward seat (on the centerline).  I used a trim router and small straight bit to carefully hollow out the shape of the mast's keyed portion. I made the cut in two passes, and then finished with some hand-sanding to fine tune the slot.  I would come back later with neat epoxy to protect the wood from future water damage.


The white Dhow is ready for paint and epoxy work, but would have to wait until a bit later in the work session.


With the paint on the white Dhow's rudder cured, I carried it back to the shop and, along with the blue Dhow's rudder, taped off the head to prepare for a coat of varnish.  I hand-sanded with 320-grit paper, vacuumed the surface and then wiped it down with a rag dampened with solvent.


With a foam brush, I completed the protect coat of varnish - essentially a cosmetic coat applied to previous applications.


I then poured a small amount of finish paint into a cup, headed back over to the white Dhow, and applied the first of a couple coats on the db trunk.  Tomorrow evening, I will likely expand my sanding a bit to include a bit of the surrounding hull surface - an attempt to use up as much of the finish paint that I have left, which is not much.


As a final task for the evening, I painted put the interior of the mast step slot with neat epoxy.  I applied a liberal amount, ensuring that none of it pooled on the bottom, and am satisfied that this coating will protect the wood during heavy use going forward.  It may be a point of maintenance seasonally, but not intensive in any way.


Total Time Today: 1.75 hrs