Friday, April 13, 2018

Final Hull Sanding (Blue Dhow)


April 13, 2018


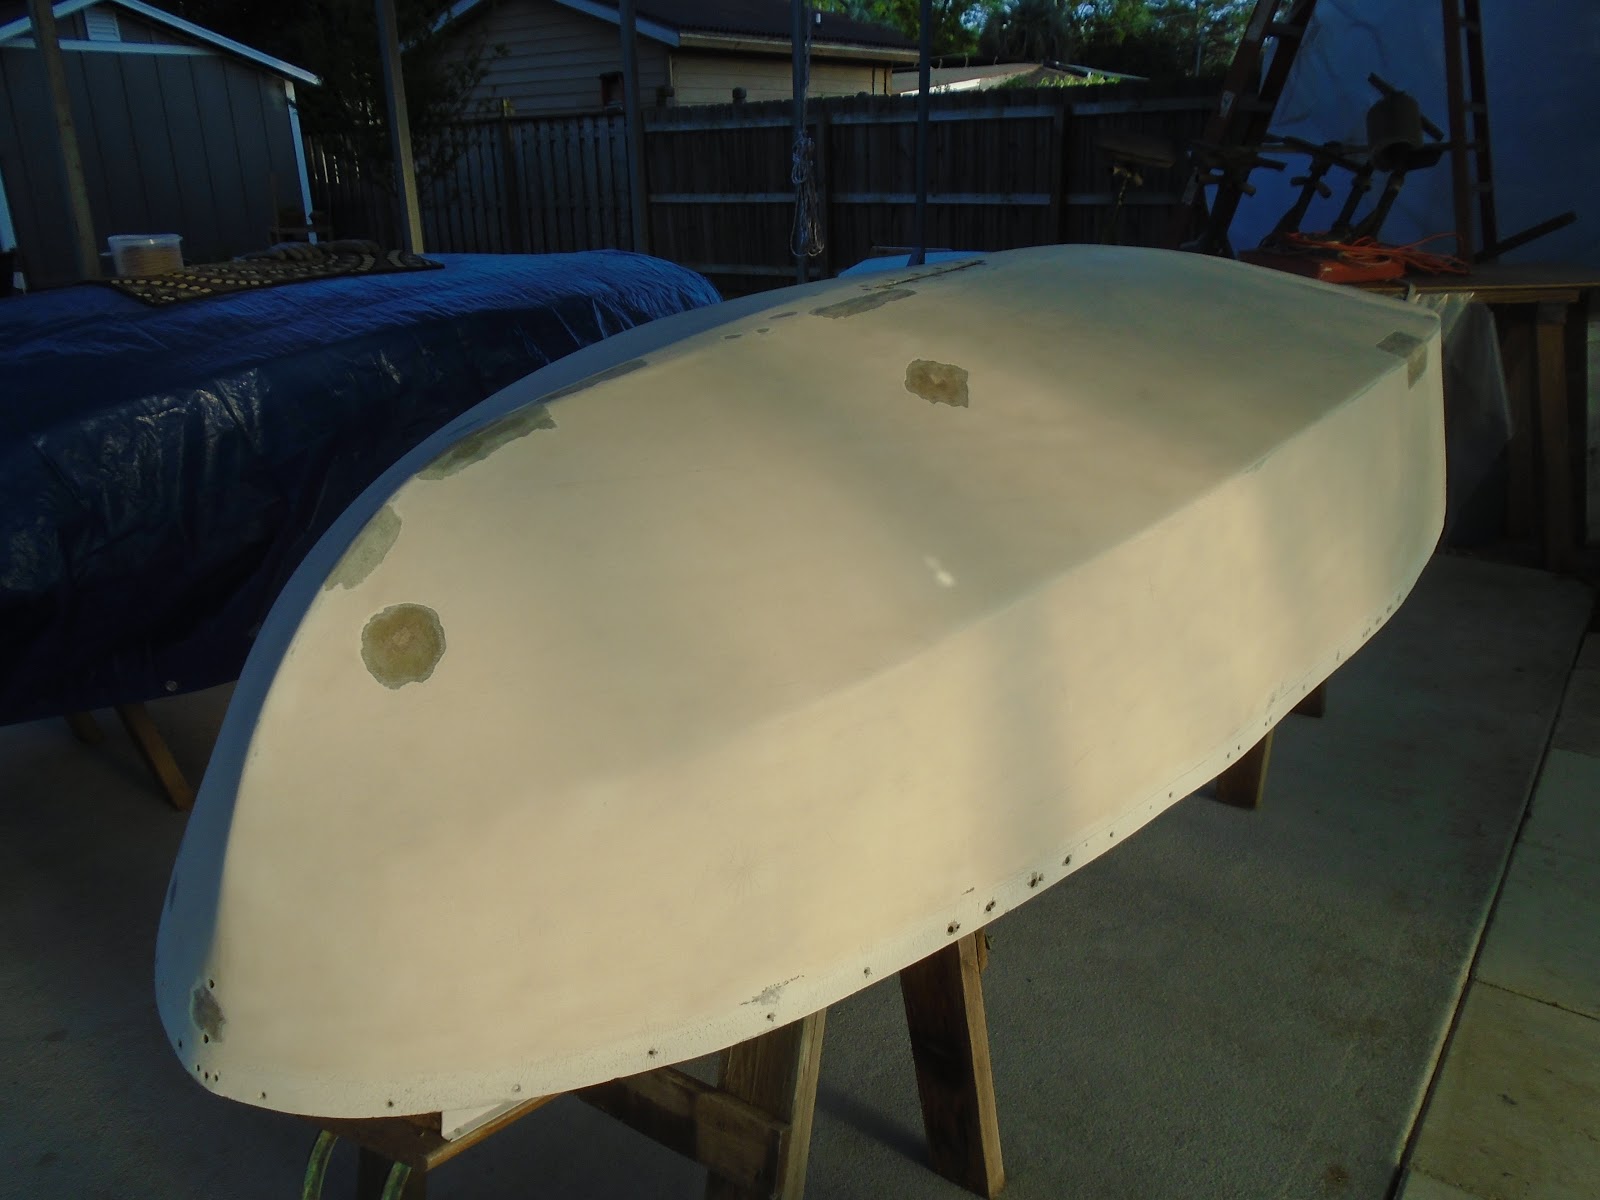
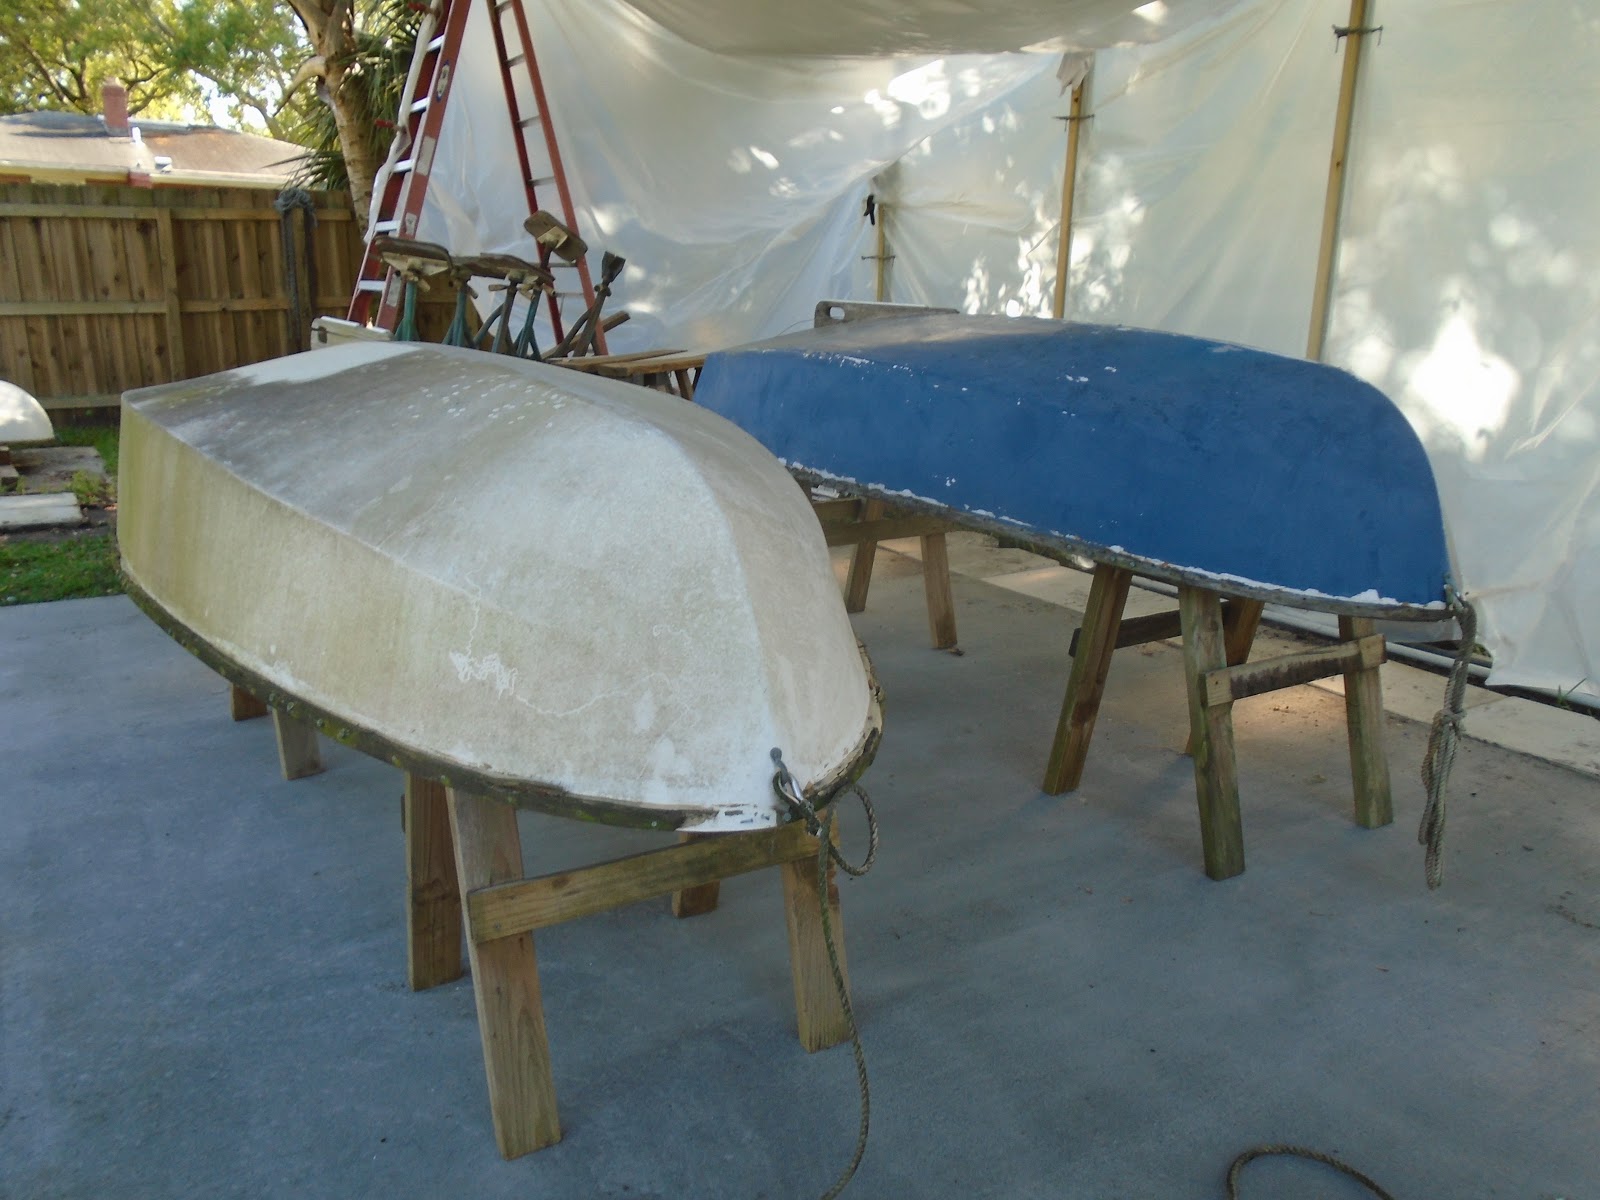
In a couple hours after work today, I managed to finish stripping the blue Dhow of its faded blue topsides paint.  I also walked around the hull inspecting for issues in the fiberglass laminate that would require more significant fill work than a mere skim coat of fairing compound.  As I had done with the white Dhow related to more significant hull imperfections (creating fiberglass patches and laminating them into solid substrate), the blue Dhow will also be getting similar treatment.  


After sanding the hull, I took the angle grinder and 40-grit flap wheel and dished out areas that required the fiberglass layup.


The blue Dhow had quite a few more issues with its laminate than the white Dhow, but there easily corrected.


It felt good to finally rid blue Dhow of its miserable color...and so now I may begin referring to them with their new names, but you'll have to stay tuned for that...


Total Time Today:  2.5 hrs

Thursday, April 12, 2018

Sanding (Blue Dhow) & Milling the White Oak


April 12, 2018


Taking advantage of some available time, I committed the hands to a three and half-hour ride on the sett of the Paris-Roubaix - thank you RO sander.  Sanding is always a contemplative exercise; not exactly a Zen-like experience, but mindful and cathartic nevertheless.

Since the white Dhow's hull is sanded and primary areas of hull damage filled, I am trying to catch the blue Dhow up in the project.  The blue Dhow has a tenacious paint application, and the 40-grit pads are earning their keep.  I was contemplating breaking out the Porter Cable 7335 (6" pad), but I'm making do...albeit slower than I'd like.  


I managed to complete the port side of the blue Dhow today...


...and stretched the work back to the transom...


...and onto the starboard hull.  In a previous session, I ground out and removed the issues areas - as can be seen below at the corner where the topsides, bottom and transom meet, as well as at the sheer line.  In the evening tomorrow, I should have the blue Dhow fully sanded and ready for fiberglass patching and fill work.  The goal for the weekend is to have both Dhows' hulls sanded, filled and faired.  I will make final passes with 120-grit pads to remove most of the remaining imperfections in the hulls, and after the major fairing work is complete.  The two to three coats of Interlux Primekote will serve to further fill the swirl marks made by the more coarse grit paper.


With the hull work drawn to a close for the day, I turned my attention to the white oak stock that I had recently purchased.  I made a contact a few days earlier that would ultimately provide me with such a blessing.  These ~12' 4/4 white oak boards were going to prove to be a challenge to joint, plane, and then rip to the 1/2" dimension that I needed for the inboard and outboard rails - or gunwales.


Meet John Comee of The South Quarter Build Co - a Jacksonville, FL based fully licensed custom home builder, historic home renovator, and fine furniture design and build company.  I had intended to take John's offer to joint a couple edges of each board and then retreat back to the humble home shop and finish milling the stock with the 13" planer and then ripping the unruly boards on the table saw.  Alas, things snowballed a bit, and in short order John's skill at reading grain, cupping, and wane  had us running the stock through the jointer, planer and ultimately ripping the boards to dimension.

Sometimes you just need to step up the game a bit, take things beyond the home-based shop...and The South Quarter Build Co's impressive shop facilities, under the adroit capabilities of John Comee turned a weekend afternoon into a half-hour shop walkabout.  Thanks John!


I transported the newly milled white oak rail material to the house, where it was quickly inspected by Bonnie von Bonster...


With Bonnie satisfied, I moved the material back into the shop.  Once the hulls have been filled and faired (essentially prepped for primer), I'll flip them and begin to fabricate a template and form to steam bend the rails onto.  Looking good for a June completion date.


Total Time Today:  4 hrs

Sunday, April 8, 2018

Brightwork & Hardware Removal, Sanding (blue Dhow)


April 8, 2018


I started work on the blue Dhow today, beginning with removal of her brightwork and hardware.  Actually, a lot of the outboard rail was dry-rotted to the point of crumbing in my hand, as well as large sections missing all together.  I did manage to remove the entirety of the inboard rail, however. 

I removed the keel by backing out 4 #12 wood screws.  The keel will be set aside as an aide to templating new keels for both Dhows.


Next, I removed the transom-hung rudder stock - secured with a combination of bronze wood screws and #10 bronze machine screws. 


I flipped up to the bow and removed the pad eyes that held the Dhow's painter.


After I removed the seating at mid-ships and forward, I then moved on to assessing and removing the inboard and outboard rails.  As I had done with the white Dhow, most of the copper rivets required the angle grinder and a cut-off wheel to remove the flattened head.  After removing the head of the rivets on the outboard side, I then used a larger flathead screwdriver and popped what was left of the outboard rail off of the Dhow.  I then hammed the remaining rivet back through the Dhow and then worked the inboard rail for removal.  I was able to remove the inboard rail without breaking it, as can be seen below.  The inboard rail was either soaked or steamed to allow for a bend that matched the bow; there are scarf-joints on the aft third of the rail.  The bend at the bow is pretty severe, and I am wondering the white oak I planned to use would take this severity of bend.  I am thinking of a installing two rails for the inboard and two rails for the outboard, both with a more mild bend, and meeting at the bow.  Nothing set in stone for the moment.


I then went "below" and removed the daggerboard trunk.  This easily came off the boat with the removal of 12 screws from the hull, and then separating the trunk from the literal fillet of silicon around the base the trunk on the interior.


With the significant hardware and brightwork removed, I turned my attention to grinding the damaged laminate.  The obvious places that required attention were: starboard aft quarter (shown below)...


...port aft quarter (shown below)...


...port mid-ships where the topsides meet the bottom (shown below) - I can suspect that the previous owner drilled a drain hole in the Dhow as he kept it lying around his backyard - hey, at least I kept her inverted and up on blocking! :)


I set up the vacuum and RO sander outfitted with 40-grit discs to begin sanding the hull.  In a previous session sanding the white Dhow, I took a moment to test sand the blue Dhow, using 80-grit discs, and noticed a 'stubborn' paint.  Because of that test sanding, I outfitted the sander with 40-grit discs...but, whatever paint is on the blue Dhow, IS ON THE BLUE DHOW!  I spent probably two hours on the hull and made the progress that can be seen below.  I will most likely break out my Porter Cable 7335 for the next go of sanding.


In the process of sanding I am noticing more damaged laminate requiring work, but certainly expected this - paint can cover a multitude of sins.  


Total Time Today: 4 hrs

Saturday, April 7, 2018

Hull Repairs (White Dhow)


April 7, 2018


I had planned to get to both Dhows today: removal of hardware and brightwork, hull washing, sanding to remove the old topcoat paint, and any fiberglass work and filling of surface voids.  Alas, the day started with a waffle and copious amounts of butter and maple syrup...enough said.  By mid-morning I was out on the boat, and decided to focus on the one Dhow for the day.  I have washed the hull the prior evening, and so was ready to begin sanding to remove the old flaking topcoat paint, traces of barnacles, and fairing filler used in previous repairs.  I set up the RO sander with 80-grit pads, connected it to the vacuum and got straight at it.  In the picture below, you can just make out the freshly sanded areas from the remaining old surfaces.


Once I had completed the sanding the hull, I outfitted the vacuum with the brush head and removed as much of the sanding debris as I could.  The next step was to evaluate the areas of damage to the hull for further repair.  In addition to the following three photos, I found numerous areas that required dishing-out the area with the angle grinder and 40-grit flap wheel; also, I went around the sheer line and ground a taper in the old fastener holes that secured the rails, oar locks, and seat braces.


Mid-ships to starboard at the transition from topsides to bottom:  chipped gelcoat and gouges.


Aft sheer to starboard: fiberglass topsides cracked through. 


Aft sheer to port: voids in fiberglass and chipped gelcoat.


Prior to getting started with grinding  and removing the damaged gelcoat and fiberglass, I "went below" and marked the locations of the seat braces and oar locks since these fastener holes would be filled with thickened epoxy.


With the seat braces and oar lock fastener locations marked for future reinstallation, I then began the grinding necessary to remove any loose gelcoat and voids in the laminate.  I started at the aft port quarter and took care of the largest of the areas requiring repair first.  With the angle grinder and flap wheel, I took removed material so as to leave me with solid laminate and gelcoat.


I moved forward on the starboard side of the hull, and as I went I ground out areas requiring it.


Moving over to the aft port quarter, I ground the surface area surrounding the crack at the sheer.


Again moving forward on the port side, I removed loose material that required removal.


Finishing at the bow, I dished out a few spots before moving on to the next phase of the hull repairs.


Because I would be filling the old fastener holes today, I need to apply a backing plate of sorts so that my efforts at pushing thickened epoxy into the openings did not result in goopy extrusions on the inboard side of the hull or droppings onto the concrete below.  I simply applied tape to the inboard surface to prevent aforementioned catastrophe.  


Since the Dyer Dhows are comprised of a fairly thin laminated fiberglass hull, offering plenty of flex as the Dhow enthusiasts climb in and out of her, I decided to further strengthen the repairs by laying a light ounce cloth in each of the larger areas requiring repair (filling and fairing).  To that end, I applied a sheet of plastic onto the location requiring new cloth, and then traced a pattern for the new fiberglass.  I labeled the patterns, and then also transferred that label to a piece of tape set next to each repair area on the hull.


I grabbed the 6oz cloth and transferred the patterns onto the cloth with a sharpie.  In doing so, I made sure to orient the direction of the fiberglass in order to ensure a good fit.


The process of wetting the repair areas out, laying glass, and filling the holes was fluid, and occurred over a 30 to 40-minute period.  The first step was to wet the areas out with 'neat epoxy' (epoxy not thickened with any filler agents); the epoxy used in these repairs is West System.  Application of the neat epoxy was to all of the areas requiring attention, whether filling old fastener holes, filling shallow gouges, or for more severely damaged areas requiring new fiberglass to be laminated.   


With all repair areas wet with neat epoxy, I moved on to mixing another batch of epoxy, and this time applying thickeners to fill voids.  The thickeners applied were 406 colloidal silica and 407 low-density fairing filler.  I thoroughly mixed a small batch of epoxy and then thickened it with a combination of 406 and 407.  I applied this thickened epoxy to all areas requiring fill work with the exception of the areas requiring additional fiberglass.


With the filler work complete, I turned my attention to cutting out the fiberglass cloth (per each numbered pattern) and then applying them.  With all of the fiberglass cloth set in place and wet out with epoxy, I then came back and filled the weave with another batch of thickened epoxy.  Next steps will be to sand the repairs areas to knock down the proud material, and then apply another skim coat of fairing filler.


Total Time Today: 4.75 hrs

Friday, April 6, 2018

Washing The Hull (Part 1)


April 6, 2018


Getting home in the evening, I got straight to work in removing the keel on the white Dhow.  The keel is secured with #12 wood screws from the interior of the hull; the keel was bedded with a polysulfide for further strength and a water-tight seal.  After I had the dry-rotted and broken keel removed, I mixed a bucket of soap to wash down the hull.


A quick rinse and she was already looking much better.  In the coming weekend, I will sand the hull, grind out voids and dings in the gelcoat, and generally prepare the hull to fill those voids and old fastener holes with thickened epoxy.  The blue Dhow will be worked on this weekend as well - removing brightwork and hardware, and prepping for hull repairs.


Total Time Today: 1 hr

Thursday, April 5, 2018

The Quarter-Sawn White Oak Purchase

April 5, 2018


I ran out during lunch to select the material to be used for the new inboard and outboard rails for the Dhows.  I selected white oak for the durability since the dinghies will be gifts to my younger brother and his family - the lakes on their northern Michigan land will provide an exceptionally beautiful venue to be introduced to sailing...and to introduce sailing to their little one, Michael.

I spent a fair amount of time culling through a bin of quarter-sawn white oak, and finally selected a couple boards of tight grain, mostly clean boards.  I had them placed in the truck, and after securing the boards I set off for home.


I placed the boards in the shop, and over the coming week will be jointing and plaining the boards prior to ripping to lengths.


I will be steam-bending the boards to then be secured onto the dinghies...


Total Time Today: 1 hr

Wednesday, April 4, 2018

Getting Started: Removing Hardware and Brightwork


April 1, 2018


With a recent project brought to conclusion and the next one a few months out, and a fresh concrete pad installed, I'm taking the opportunity to restore two of the three Dyer Dhows in my possession  - yes, I'm a fan of these classic little sailing dinghies.  In fact, one of the two boats I will be restoring does not have a centerboard trunk and slot.  Since I have the sailing rigs for both boats, part of the restoration will include creating a centerboard trunk and slot for one of the boats.  For now, my focus is to remove the deteriorating brightwork (rails), and the hardware in order to prep for sanding and hull repairs.

With some assistance, I managed to stage the dinghies for this initial work.


To begin, I removed the pad eyes on the white dinghy.


I removed both aft bronze thwarts...


...as well as oar locks.


I ground off the heads of the rivets holding the inboard and outboard rails in place, removed the bolts securing the seat bracing, and then extricated the crumbling teak rails.  I had limited time late in the afternoon and chose to draw things to a close, the bottom was now prepped for sanding (less removal of the small keel).


Total Time Today: 2 hrs

Installing the False Bulkheads & Naming

July 16, 2018 With just a few items left to complete the Dhows, I wasted no time in getting some help to flip them right side up.  ...